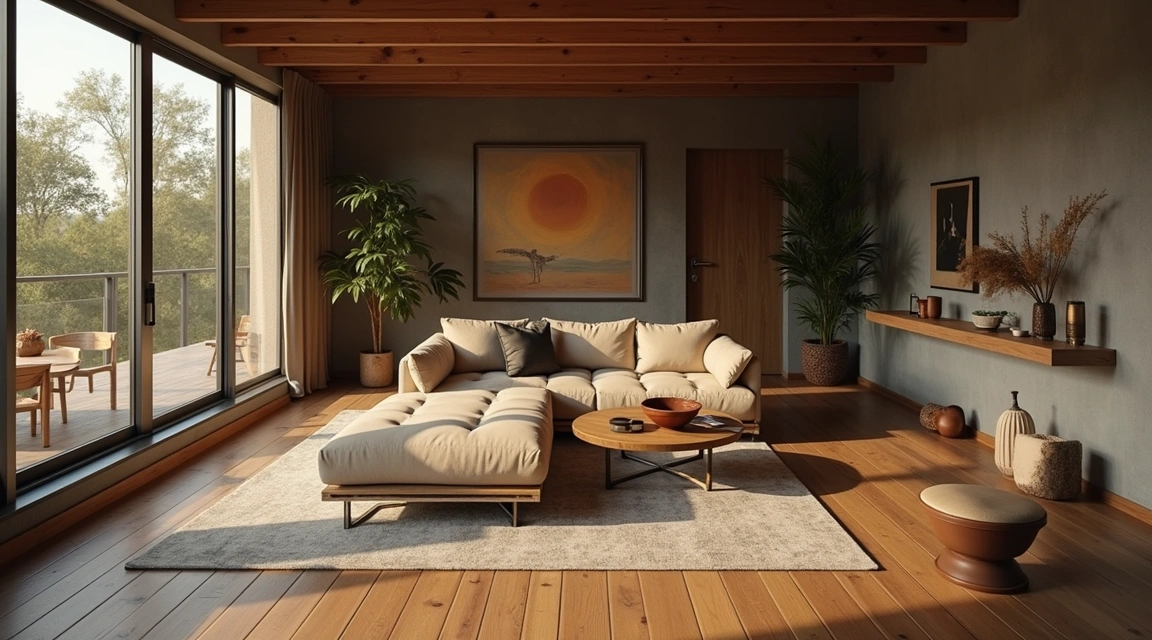
Mixing brass finishes throughout your home has become one of the most popular interior design trends, allowing homeowners to create layered, collected spaces with warmth and character. Rather than matching every metal fixture perfectly, blending different brass tones—from polished and lacquered to antique and unlacquered—adds depth and visual interest to any room. This approach works beautifully in kitchens, bathrooms, living rooms, and bedrooms, giving your home a designer look without requiring a complete overhaul of existing hardware.
The key to successfully mixing brass finishes lies in understanding which combinations work harmoniously and how to distribute different tones throughout a space. When done thoughtfully, this technique prevents rooms from looking too matchy or sterile while maintaining a cohesive aesthetic. Whether you’re updating cabinet hardware, light fixtures, faucets, or decorative accessories, learning to blend brass finishes confidently will transform your interiors from ordinary to extraordinary.
Understanding Different Brass Finish Types
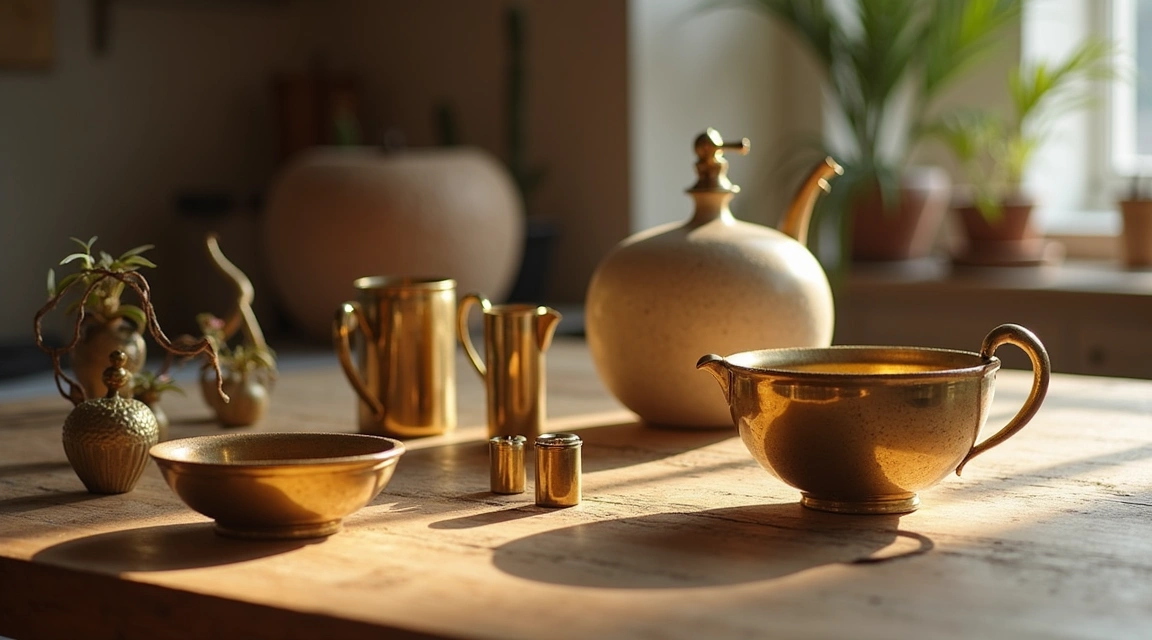
Before you begin mixing, familiarize yourself with the main brass finish categories available. Polished brass offers a bright, reflective gold surface that looks freshly minted and formal. This finish works well in traditional settings and adds immediate glamour to any space. However, polished brass requires regular maintenance to prevent tarnishing and fingerprints from showing.
Antique brass features a darker, aged appearance with brownish undertones and subtle patina. This finish suggests history and pairs beautifully with rustic, farmhouse, or vintage-inspired decor. Manufacturers create this look through chemical treatments that simulate natural aging, giving new fixtures an heirloom quality.
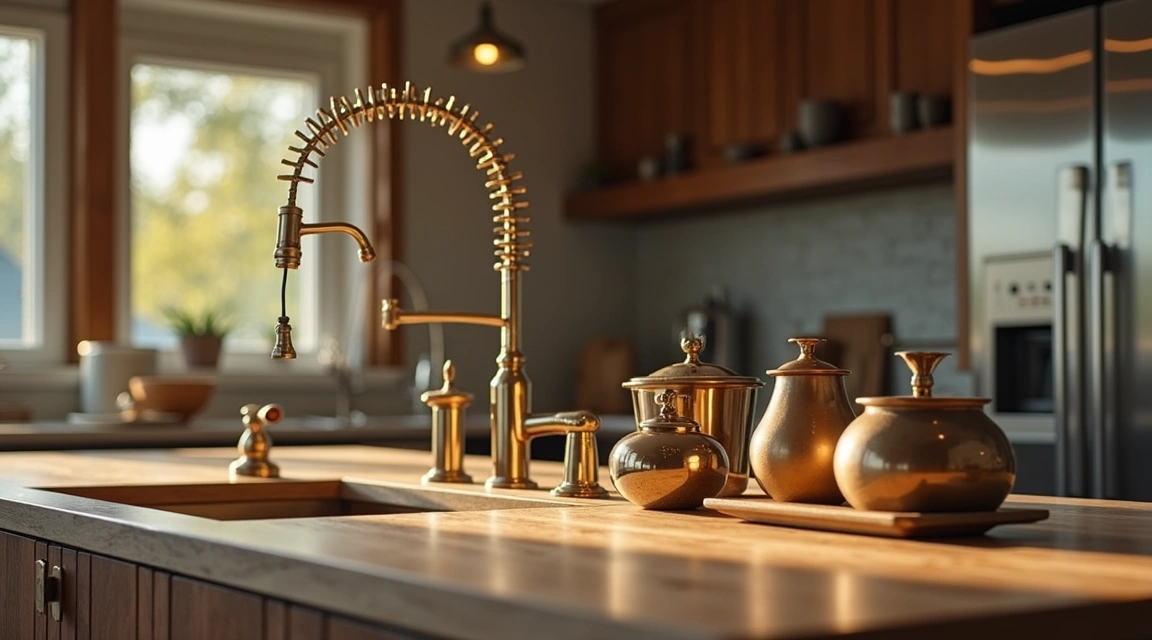
Satin brass (also called brushed brass) has a matte, non-reflective surface with visible linear grain patterns. This contemporary option hides fingerprints better than polished finishes and works especially well in modern and transitional interiors. The subdued sheen provides warmth without the high shine of polished brass.
Unlacquered brass starts bright but develops a living patina over time as it oxidizes naturally. This finish appeals to homeowners who appreciate the character that develops through use and exposure. The evolving appearance means no two pieces look exactly alike, adding authentic uniqueness to your home.
Caution: Purchase samples of each finish type before committing to full installations, as photographs rarely capture the true appearance and reflective qualities of brass finishes accurately.
Step 1: Choose Your Dominant Brass Finish
Select one brass finish to serve as your primary tone throughout the space. This dominant finish should appear on your largest or most prominent fixtures—typically faucets, cabinet hardware, or major light fixtures. Choosing a primary finish creates visual continuity and prevents the room from feeling chaotic or disconnected.
For kitchens, many designers recommend starting with your faucet and cabinet hardware as the dominant finish, since these elements appear repeatedly and occupy significant visual space. In bathrooms, the faucet, shower fixtures, and towel bars typically establish the primary tone. Living spaces might use lighting fixtures or curtain rods as the dominant brass element.
Consider your room’s overall style when selecting your primary finish. Modern and contemporary spaces often benefit from satin brass as the dominant tone, while traditional rooms look stunning with polished brass taking the lead. Transitional and eclectic styles can successfully use antique brass as their foundation.
Caution: Resist the temptation to split your dominant finish 50-50 with another tone, as this creates visual confusion rather than intentional mixing—aim for a 60-70% presence of your primary finish.
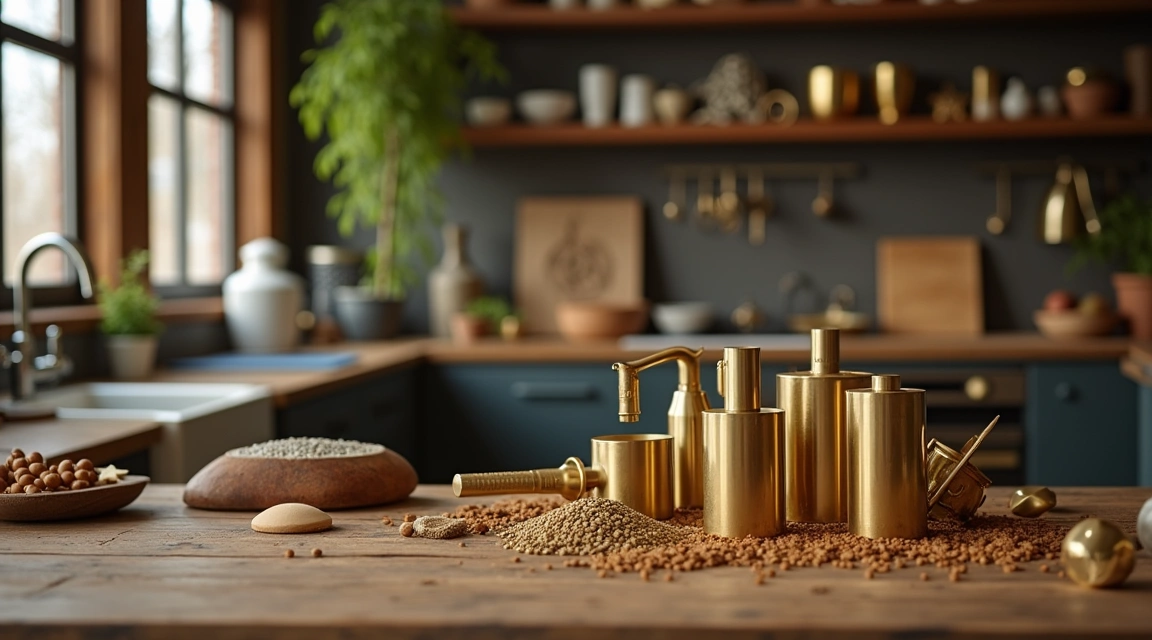
Step 2: Select One or Two Accent Finishes
Once your dominant finish is established, choose one or two complementary brass tones to use as accents. These secondary finishes should appear on smaller fixtures, accessories, or less prominent hardware. The contrast between finishes adds dimension while the limited palette maintains cohesion.
A classic combination pairs satin brass as the dominant finish with polished brass accents on decorative elements like picture frames, small lamps, or decorative bowls. Another popular mix uses antique brass for major fixtures with unlacquered brass on statement pieces that will develop character over time.
In kitchens, you might use satin brass for cabinet pulls and drawer handles while selecting polished brass for pendant lights or open shelving brackets. Bathrooms can feature antique brass faucets and towel bars with satin brass mirror frames or light sconces.
Limit yourself to three different brass finishes maximum in a single room. More than three creates visual clutter rather than intentional layering. Remember that your eye needs repetition to recognize the mixing as deliberate rather than accidental mismatching.
Caution: Ensure your accent finishes complement rather than clash with your dominant tone—test combinations in your actual lighting conditions, as natural versus artificial light dramatically affects how brass finishes appear together.
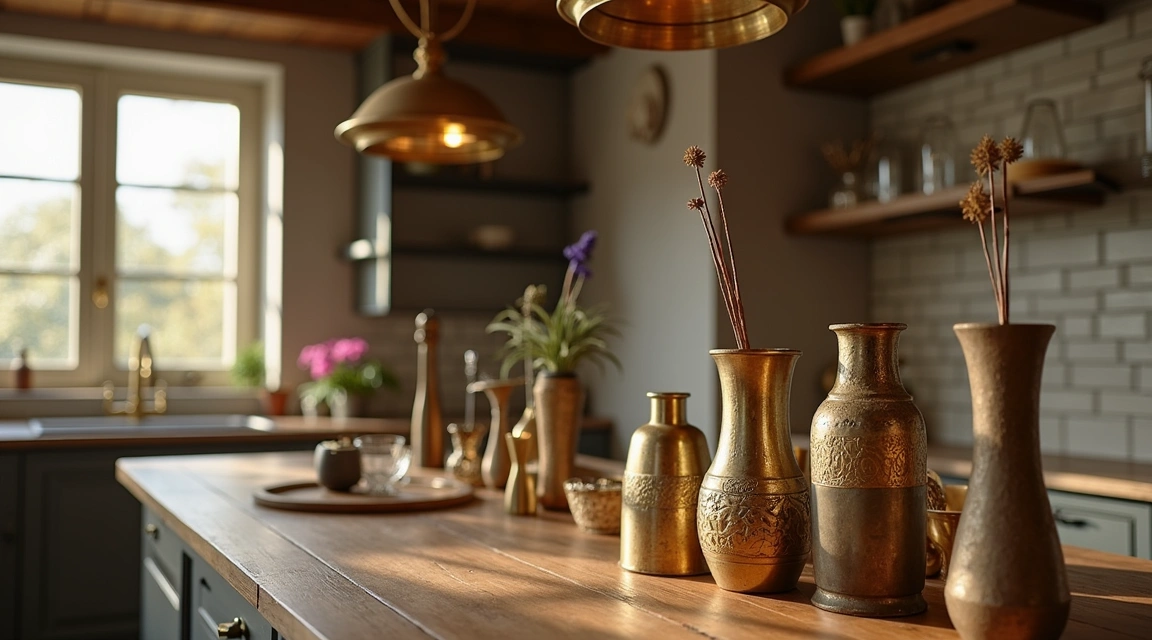
Step 3: Distribute Finishes Thoughtfully Throughout the Space
Strategic placement determines whether mixed brass finishes look professionally designed or haphazard. Distribute each finish throughout the room rather than clustering all of one finish in a single area. This distribution creates visual rhythm and helps the eye move naturally around the space.
In a kitchen, if satin brass appears on upper cabinet hardware, include satin brass elements on lower cabinets too. If polished brass accents the pendant lights above the island, echo that finish in a decorative tray or small hardware detail elsewhere. This repetition signals intentionality.
Create visual triangles by placing the same finish in three different locations around the room. For example, an antique brass faucet might be echoed by an antique brass cabinet pull on the opposite wall and an antique brass picture frame on a third wall. This triangle principle helps the eye recognize pattern and purpose.
Consider the sight lines in your space. Elements visible from the main entrance or seating areas carry more visual weight than those tucked in corners. Place your dominant finish where eyes naturally land first, using accent finishes to reward closer inspection.
Caution: Avoid placing drastically different finishes (like bright polished brass next to heavily aged antique brass) immediately adjacent to each other, as the contrast can be jarring—separate them with at least 18-24 inches of visual space.
Step 4: Balance Brass with Other Metal Finishes
While focusing on mixing brass tones, consider how brass interacts with other metals already present in your space. Brass mixes beautifully with matte black, brushed nickel, chrome, and even stainless steel when proportions remain balanced. The warm tones of brass complement the cool tones of these metals naturally.
In kitchens with stainless steel appliances, brass finishes provide warm contrast without competing. The key is treating your brass as the decorative accent and the stainless steel as the functional backdrop. Similarly, matte black fixtures can ground a space where multiple brass finishes might otherwise feel too warm or ornate.
A successful multi-metal room might feature 50% brass finishes (mixed varieties), 30% matte black, and 20% brushed nickel. These proportions allow brass to dominate while creating sophisticated contrast. Alternatively, you might choose 70% mixed brass with 30% chrome for a warmer overall palette.
When introducing other metals, maintain the same mixing principle: choose one other metal as secondary and limit additional metals to small accent roles. Too many different metals create the same visual confusion as too many brass finishes.
Caution: Avoid mixing brass with gold-toned finishes like champagne bronze or rose gold, as these similar-but-different warm metals tend to look like mistakes rather than intentional choices—stick to clearly distinct metal families.
Step 5: Use Finish Mixing on Both Fixed and Movable Elements
Successful brass mixing occurs on both permanent architectural elements and movable decorative accessories. Fixed elements include cabinet hardware, plumbing fixtures, lighting fixtures, and door hardware—these establish your foundational palette. Movable elements like picture frames, trays, candlesticks, and decorative objects allow flexibility and seasonal updates.
Start with permanent fixtures in your chosen finishes, as these involve more commitment and expense. Once your fixed elements establish the brass mixing pattern, layer in accessories that echo and reinforce the combination. A polished brass faucet becomes more intentional when surrounded by polished brass drawer pulls and a polished brass tray on the counter.
Movable accessories provide opportunities to test finish combinations before committing to permanent installations. Purchase small items in different brass tones and live with them for several weeks, observing how they look in morning light, afternoon light, and evening artificial light.
This layered approach also allows you to adjust the ratio of finishes over time. If your mixed brass feels too evenly distributed, adding more accessories in your dominant finish strengthens the hierarchy without replacing permanent fixtures.
Caution: Resist adding brass finishes to every possible surface and object—leave some elements in non-brass materials like wood, ceramic, or glass to prevent brass overload and maintain visual breathing room.
Step 6: Maintain and Care for Mixed Brass Finishes Properly
Different brass finishes require different maintenance approaches, and mixing finishes means managing multiple care routines. Polished and lacquered brass needs regular cleaning with gentle brass cleaner to maintain its bright shine and prevent tarnish from breaking through the protective coating. Use soft cloths and avoid abrasive materials that scratch the finish.
Antique and aged brass finishes generally need only mild soap and water for cleaning. These finishes are designed to look aged, so slight darkening or patina development actually enhances their character. Avoid brass polishes on these finishes, as they’ll strip away the intentional antiquing.
Unlacquered brass requires the most accepting approach, as it will develop patina naturally. Some homeowners embrace this evolution completely, while others periodically polish high-touch areas like faucet handles while letting decorative pieces age. Decide your philosophy before installing unlacquered brass so changes don’t surprise you.
Satin brass typically needs only regular dusting and occasional cleaning with mild detergent and water. The brushed surface hides minor wear better than polished finishes, making it relatively low-maintenance. Dry thoroughly after cleaning to prevent water spots from developing.
Caution: Never use the same cleaning product on all your brass finishes without checking manufacturer recommendations—products designed for polished brass can damage antique or unlacquered finishes, and vice versa.
Common Mistakes When Mixing Brass Finishes
The most frequent error homeowners make is mixing too many different brass finishes in a single space. While variety adds interest, exceeding three distinct finishes creates visual chaos. Your eye can’t establish pattern or rhythm with too many competing tones, resulting in a space that looks accidentally mismatched rather than intentionally curated.
Another common mistake involves purchasing brass finishes from too many different manufacturers. Even when labeled the same (like “antique brass”), finishes vary significantly between brands. Whenever possible, source your dominant finish from a single manufacturer to ensure consistency, then thoughtfully introduce accent finishes from other sources.
Many people also err by mixing finishes without considering the undertones. Some brass finishes lean more golden-yellow, while others have reddish or brownish undertones. Mixing finishes with clashing undertones creates dissonance. Hold samples together in your home’s lighting to verify they harmonize before purchasing.
Failing to repeat finishes throughout the space is another pitfall. If a particular brass tone appears only once, it looks like an oversight rather than an intentional choice. Each finish you introduce should appear at least twice, and ideally three times, within the same room or open-concept area.
Finally, some homeowners mix brass finishes without considering the overall metal palette. If your appliances, existing light fixtures, or other permanent elements feature different metals, make sure your brass choices complement rather than compete with these existing finishes.
Bringing It All Together
Mixing brass finishes at home allows you to create spaces with depth, character, and a collected-over-time aesthetic that feels both sophisticated and personal. By choosing a dominant brass tone, limiting accent finishes to one or two varieties, and distributing them thoughtfully throughout your space, you’ll achieve a designer look that feels intentional and cohesive.
Remember that successful brass mixing relies on repetition, proportion, and harmony. Your dominant finish should appear most frequently, accent finishes should echo throughout the space, and all finishes should share complementary undertones. Whether you’re renovating an entire room or simply updating hardware and accessories, these principles will guide you toward beautiful results.
Start small if you’re hesitant—replace cabinet hardware or update lighting fixtures in mixed brass finishes before committing to larger installations. As you become comfortable seeing different brass tones together, you’ll develop confidence in expanding the technique to additional areas of your home. The beauty of mixing brass finishes lies in its flexibility: you can always adjust, add, or refine as your taste evolves and your understanding of the technique deepens.