
When I bought my first home three years ago, I thought cabinet hardware would be the easiest part of the renovation—just pick some knobs and pulls, right? Wrong. I quickly learned that overlooking the planning stage meant overspending on rush orders, mismatched finishes, and hardware that didn’t fit my drawer fronts. Cabinet hardware prices can range dramatically based on material, finish, brand, and quantity, and without a solid checklist, first-time buyers often find themselves surprised by the final bill. This guide walks you through the essential planning steps I wish I’d known from the start, helping you budget accurately and avoid the pitfalls I encountered.
Understanding the Full Scope of Cabinet Hardware Costs
Cabinet hardware isn’t just the knobs and pulls you see on display. Your total investment includes hinges, drawer slides, mounting screws, backplates, and sometimes specialty items like soft-close dampers or push-to-open mechanisms. When I first priced out my kitchen, I focused only on the visible pulls and completely forgot about hinges—adding several hundred dollars to my budget at the last minute.
Start by counting every cabinet door and drawer in your space. Multiply doors by the number of hinges each requires (usually two for standard doors, three for taller ones). Count drawers and decide whether each needs one centered pull or two symmetrical handles. Don’t forget about any cabinet doors that open in pairs or corner units that might need specialized hardware.
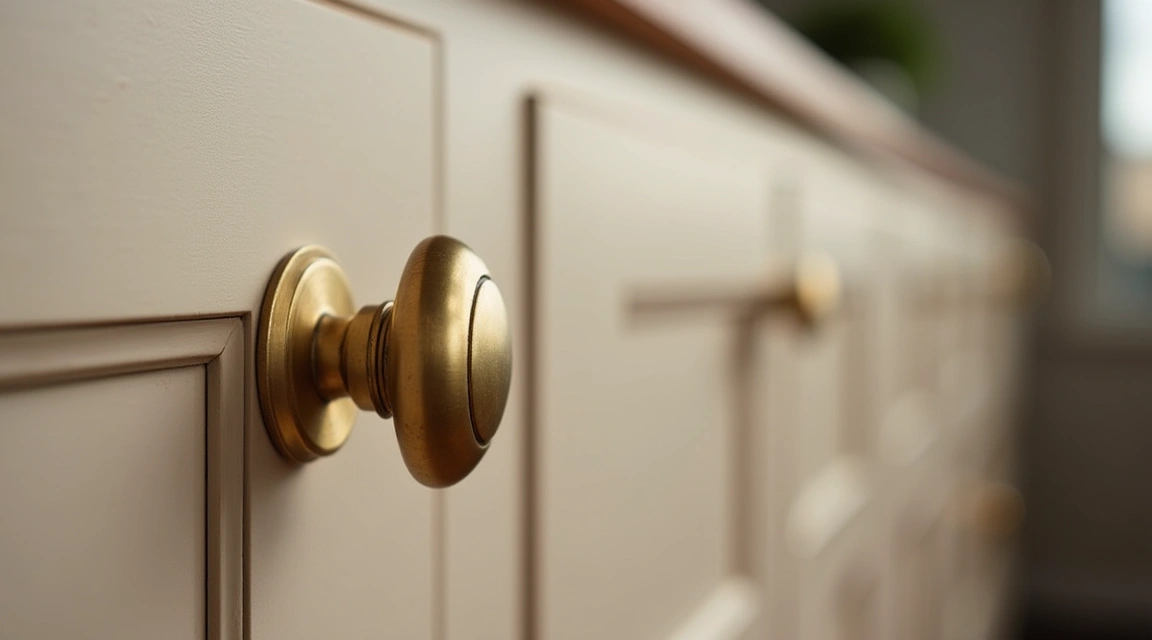
Material and finish dramatically affect pricing. Solid brass, stainless steel, and bronze hardware typically cost more than zinc alloy or plastic options. Brushed nickel and matte black are popular mid-range finishes, while unlacquered brass, oil-rubbed bronze, and polished nickel often command premium prices. For first-time buyers working within a budget, focusing on high-traffic areas like kitchen drawer pulls and entry points with quality hardware, then using more economical options for less-visible cabinets, can help balance cost and durability.
For more context on setting expectations around hardware investments, visit our Cabinet Hardware Prices section.
Pros of Thorough Pre-Purchase Planning
Having a detailed checklist before you shop saves both money and frustration. When I finally sat down and mapped everything out, I discovered I needed forty-three pieces of hardware, not the twenty I’d estimated. Buying in bulk often unlocks better per-unit pricing, and many suppliers offer discounts when you purchase complete sets rather than individual pieces.
Planning ahead also lets you compare suppliers methodically. I found the same brushed nickel pull priced anywhere from under two dollars to over fifteen dollars depending on the retailer. Online marketplaces, local hardware stores, specialty cabinet shops, and big-box retailers all have different pricing structures and return policies. By knowing exactly what you need, you can request quotes, wait for sales, and avoid impulse purchases that don’t match your overall design.
Another major advantage is ensuring compatibility. Not all pulls fit all drawer fronts, and hole spacing (the distance between screw holes, called “center-to-center” measurement) must match your cabinets or require new drilling. I made the mistake of buying beautiful pulls with 5-inch spacing for drawers drilled at 3 inches, meaning either returns or extra drilling work. A checklist forces you to measure first, preventing costly mismatches.
Finally, a solid plan helps you stage your project. You can order long-lead items early, schedule installation around delivery dates, and avoid mid-project trips to the hardware store that eat up time and add impulse buys. When everything arrives together, installation goes smoothly and you maintain design consistency across all cabinets.
Cons and Challenges of Planning Ahead

Planning takes time, and for first-time buyers eager to start a project, the temptation to skip this step is strong. Creating a detailed checklist means measuring every cabinet, researching finishes, comparing suppliers, and waiting for quotes—all before you make a single purchase. When I was ready to transform my kitchen, the last thing I wanted to do was spend a weekend with a tape measure and spreadsheet.
There’s also the risk of over-planning and analysis paralysis. With thousands of styles, finishes, and price points available, it’s easy to get overwhelmed. I spent hours agonizing over subtle finish differences that, in hindsight, no one but me would ever notice. Sometimes the search for the absolute perfect hardware at the absolute best price delays your project unnecessarily.
Bulk purchasing, while cost-effective, carries its own risk. If you order forty pulls and later decide you don’t like the finish in your actual lighting, returns can be complicated, especially if you’ve opened packaging or ordered custom pieces. I learned this the hard way when my “antique brass” looked more yellow than bronze once installed, and the supplier’s return policy only covered unopened items.
Market prices fluctuate, and hardware trends shift. A finish that’s widely available and affordable today might become scarce or premium-priced next year. Locking in your choices early means committing before you see the full picture of your renovation. For buyers tackling a phased project, this can lead to finish mismatches if you need to reorder months later and your original style has been discontinued.
Who Should Use This Planning Checklist
This planning approach works best for first-time buyers undertaking a complete cabinet refresh or new construction project. If you’re installing hardware on more than a handful of cabinets, the time invested in planning pays immediate dividends in cost savings and design cohesion. I found the checklist essential when working with a fixed budget—it kept me honest about costs and prevented scope creep.
Homeowners hiring contractors or cabinet installers also benefit. A detailed hardware list allows you to source your own materials if it saves money, or at least verify that contractor quotes are reasonable. My installer appreciated having all hardware on-site before he started, which sped up the job and avoided costly return visits.
DIY renovators on a timeline should absolutely use a checklist. Nothing stalls a project faster than discovering mid-installation that you’re three pulls short or that your chosen hinges don’t fit your overlay. For anyone juggling work, family, and a renovation, the peace of mind that comes from knowing you have everything you need is worth the upfront planning effort.
If you’re replacing just a few pieces or doing a quick rental upgrade, a full planning checklist might be overkill. In those cases, buying a small quantity at a local store and keeping receipts for easy returns is simpler. But for comprehensive projects where hardware costs add up quickly, the checklist becomes essential.
Frequently Asked Questions
How much should I budget per piece of cabinet hardware?
Pricing varies widely based on material and finish, so it’s difficult to give a single figure that applies to everyone. Basic zinc-alloy knobs can be found for as little as one or two dollars each, while high-end solid brass or designer pulls may cost fifteen dollars or more per piece. Mid-range options in popular finishes like brushed nickel or matte black typically fall somewhere in between. When I renovated my kitchen, I budgeted around five to seven dollars per pull and three to five dollars per knob for good-quality hardware that would last. Always add at least ten percent to your total for shipping, tax, and a few extras in case of damage or measurement errors. Getting quotes from multiple suppliers will give you a realistic range for your specific style and quantity.
Should I match all my cabinet hardware finishes exactly, or can I mix metals?
This comes down to personal style and the overall design of your space. Matching finishes throughout creates a cohesive, traditional look and simplifies purchasing and future replacements. Mixing metals—like pairing brass pulls with black knobs—has become popular in modern and transitional kitchens, but it requires a confident design eye to avoid a disjointed appearance. When I mixed finishes, I kept one metal for all pulls and another for all knobs, which maintained visual order. If you’re unsure, start with a matched set; you can always introduce accent pieces later. Remember that “matching” doesn’t always mean identical across every room—bathroom hardware doesn’t have to match kitchen hardware perfectly, though keeping within the same finish family helps the home feel unified.
What measurements do I absolutely need before ordering cabinet hardware?
At minimum, you need the center-to-center measurement for any pulls or handles, which is the distance between the two screw holes. This must match your existing holes or you’ll need to drill new ones. For knobs, check the screw length to ensure it’s long enough to go through your cabinet door or drawer front and engage the mounting nut, but not so long it hits the interior. I also measured door and drawer widths to ensure pull lengths were proportional—a tiny pull on a wide drawer looks awkward, while an oversized pull on a narrow door can interfere with adjacent cabinets. Finally, note your cabinet overlay type (full overlay, partial overlay, or inset) if you’re replacing hinges, as this determines which hinge style you need. Taking these measurements before you shop prevents returns and installation headaches.